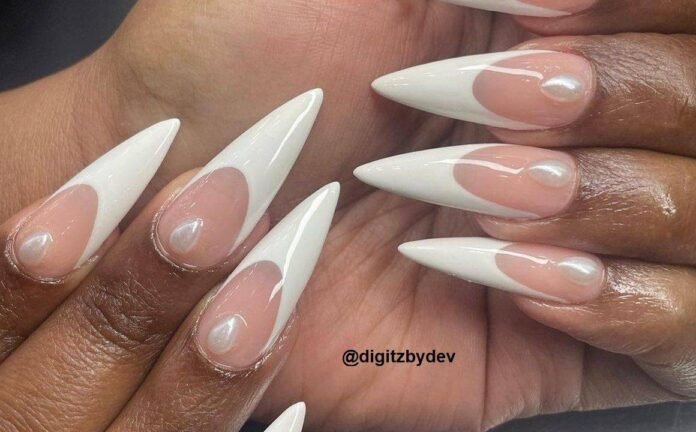
Pearl nails have become a highly sought-after trend in the world of nail art, offering a sophisticated and glamorous look that is both timeless and fashionable. If you’re looking to achieve that pretty and posh nail appearance, here’s a detailed guide on how to create stunning pearl nails.
The first step in achieving pearl nails is choosing the right base color. A pale, neutral shade such as soft pink, nude, or light beige works well as it provides a subtle backdrop that allows the pearls to stand out. You can also opt for a light pastel color to add a hint of playfulness.
Once you have your base color applied and dried, it’s time to select the pearls. There are various types and sizes of pearls available for nail art. Small, dainty pearls give a more delicate and refined look, while larger pearls can make a bolder statement. You can choose pearls in classic white or experiment with pastel-colored ones to match your overall nail design.
To attach the pearls to your nails, apply a small amount of nail glue to the area where you want the pearl to be placed. Gently press the pearl onto the glue and hold it for a few seconds until it adheres securely. You can arrange the pearls in a single row along the tip of the nail, create a pattern, or scatter them randomly for an artistic effect.
After the pearls are in place, it’s important to seal and protect your design. Apply a clear top coat over the entire nail to ensure the pearls stay in place and to give your nails a smooth and shiny finish. This top coat also adds durability to your manicure.
For an extra touch of elegance, you can combine the pearls with other nail art elements such as rhinestones, glitter, or gold accents. For example, adding a thin gold line along the edge of the nail or placing a rhinestone in the center of each pearl can enhance the overall look.
If you prefer a more elaborate design, consider creating a gradient effect with the base color before adding the pearls. This adds depth and dimension to your nails. You can also use different sizes and shapes of pearls to create a 3D effect.
When it comes to maintaining your pearl nails, be gentle to avoid dislodging the pearls. Avoid excessive force when doing daily tasks and use a non-acetone nail polish remover when needed.
In conclusion, achieving a pretty and posh pearl nail look is all about attention to detail and creativity. With the right combination of base color, pearl placement, and additional accents, you can transform your nails into a work of art that is sure to turn heads and make you feel confident and stylish. So, go ahead and embrace the beauty of pearl nails to add a touch of sophistication to your look.


